


Digital Marketing has come a long way. There are a lot of platforms, systems, programs, strategies, and campaigns to choose from to help a business thrive online. One of the most crucial things to know when starting an online business is to understand the analytics behind the strengths and weaknesses of a campaign. There are tools to measure and analyze statistics for a website, and the most famous one is Google Analytics. It is a web analytics service provided by Google that tracks or records reports regarding website traffic, currently as a platform inside the Google Marketing Platform. To put it simply, Google Analytics monitors the performance of your marketing, products, and more. One of the features of Google Analytics is Google Tag Manager.
What is Google Tag Manager?
Google Tag Manager is a tool with a user-friendly, web-based interface that simplifies the process of working with tags. With it, you’re able to add, edit, and disable tags without having to change anything from the source code. It simplifies the task of managing tags for your website. Marketers can use this tool without the use of web development.
How to set it up?
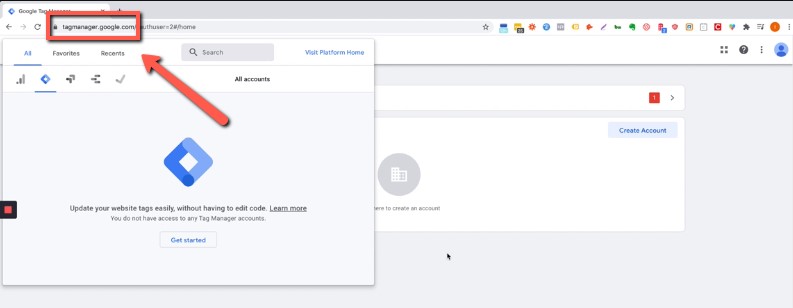
- Go to tagmanager.google.com, make sure you have a Google account to access it. If you already have a Google Analytics account, it is best to create the Google Tag Manager from there.
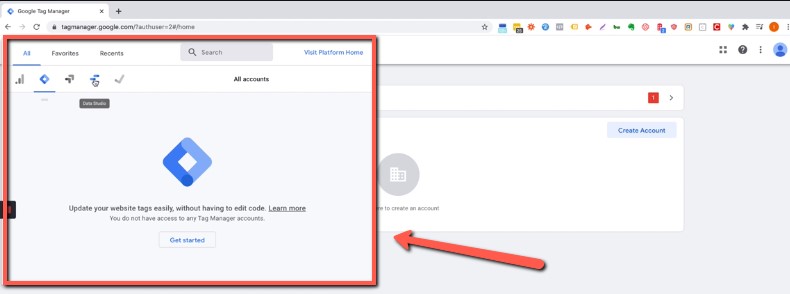
2. You can click on Accounts to view the account registered. It will then show a pop-up window to manage the connected accounts on the Google Tag Manager.

3. Click on the Diamond logo to access Google Tag Manager.
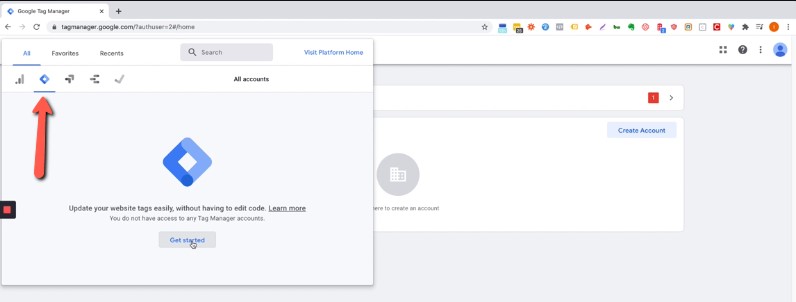
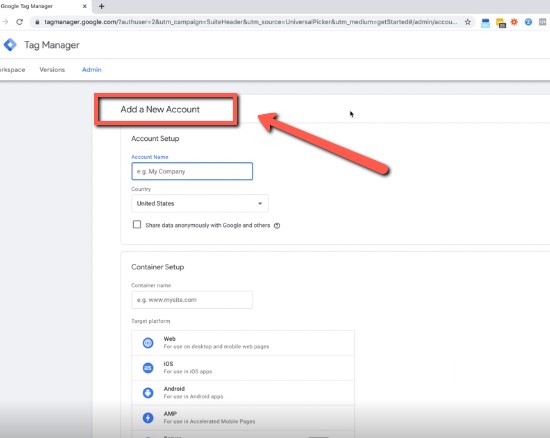
4. Click on ‘Get Started’ and you will be redirected to the accounts page. If you already have an account, you can simply access the connected account. If there is none, create an account. Input all the details and save.
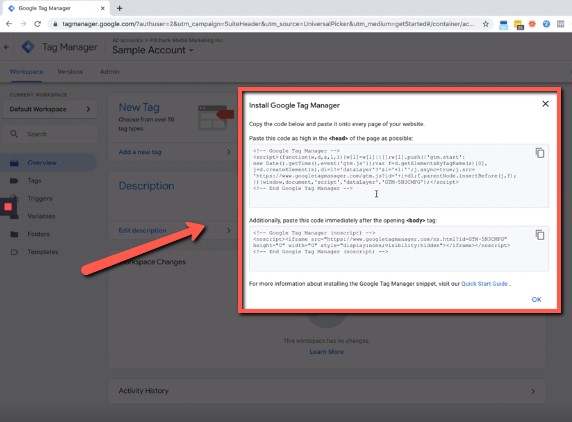
5. Once you have agreed to the policies and regulations of Google Tag Manager, it will then give you 2 codes. One is for the head, and one is for the body. Usually, the head code should be placed on the universal code or the head tag of the page you are working on, and the body code should be placed on a module on the website, which could be an HTML module or others.
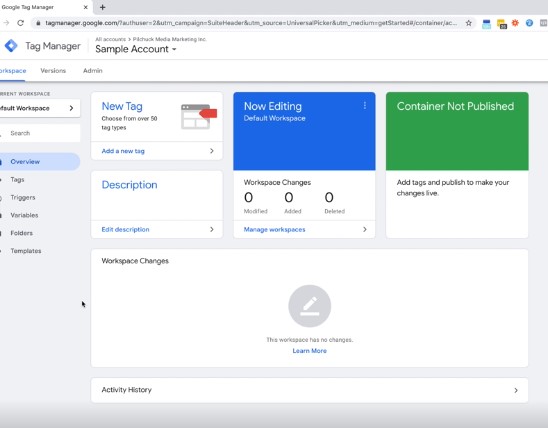
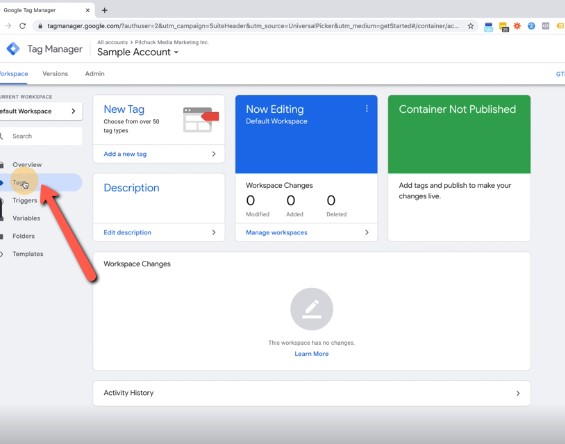
6. You can now view the dashboard of the account. You can see the overview, tags, triggers, and other features offered by GTM.
7. If you want to invite users, you can simply click on the ‘Admin’ tab, and select User Management. You can now add or edit users or even administrators.
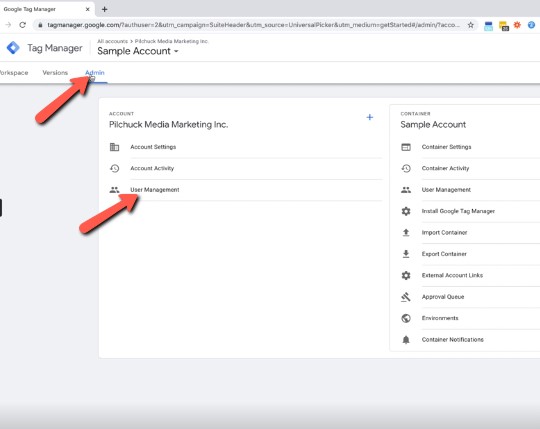
And then it will open a pop-up window for the list of users.

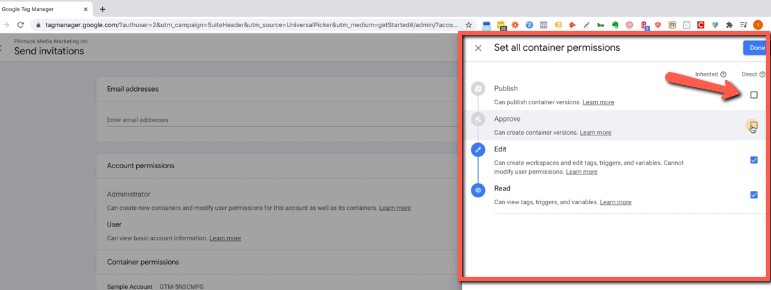
8. Add or select a user, and it will display the permissions for each user. You can specify the admin access of each user registered on the account.
9. Go to Tags on the ‘Workplace’ tab.
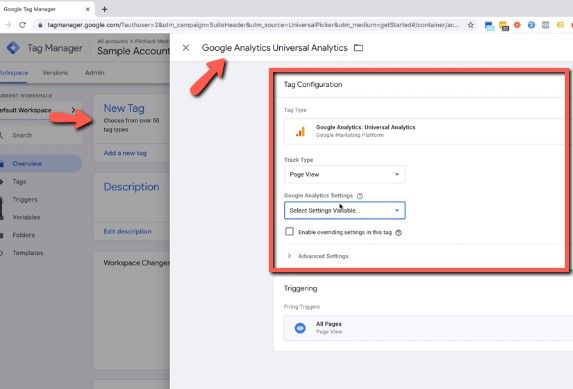
10. Create a new tag by clicking ‘new’, then click on Tag configuration and select the necessary configuration for your GTM. There are tons of tools and customization, make sure to select what is best for your website and business.
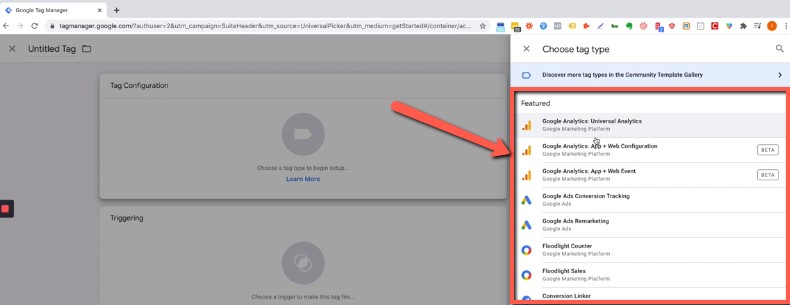
11. Choose the tag for the website and make sure to save everything. Choosing the tag is pretty straightforward, you won’t get confused.
Google Tag Manager can make your life easier by handling a large amount of tags. It also records vital information regarding tags utilized by your website. Make sure to keep in mind the analytics as it will help your business grow and progress during the digital marketing generation!